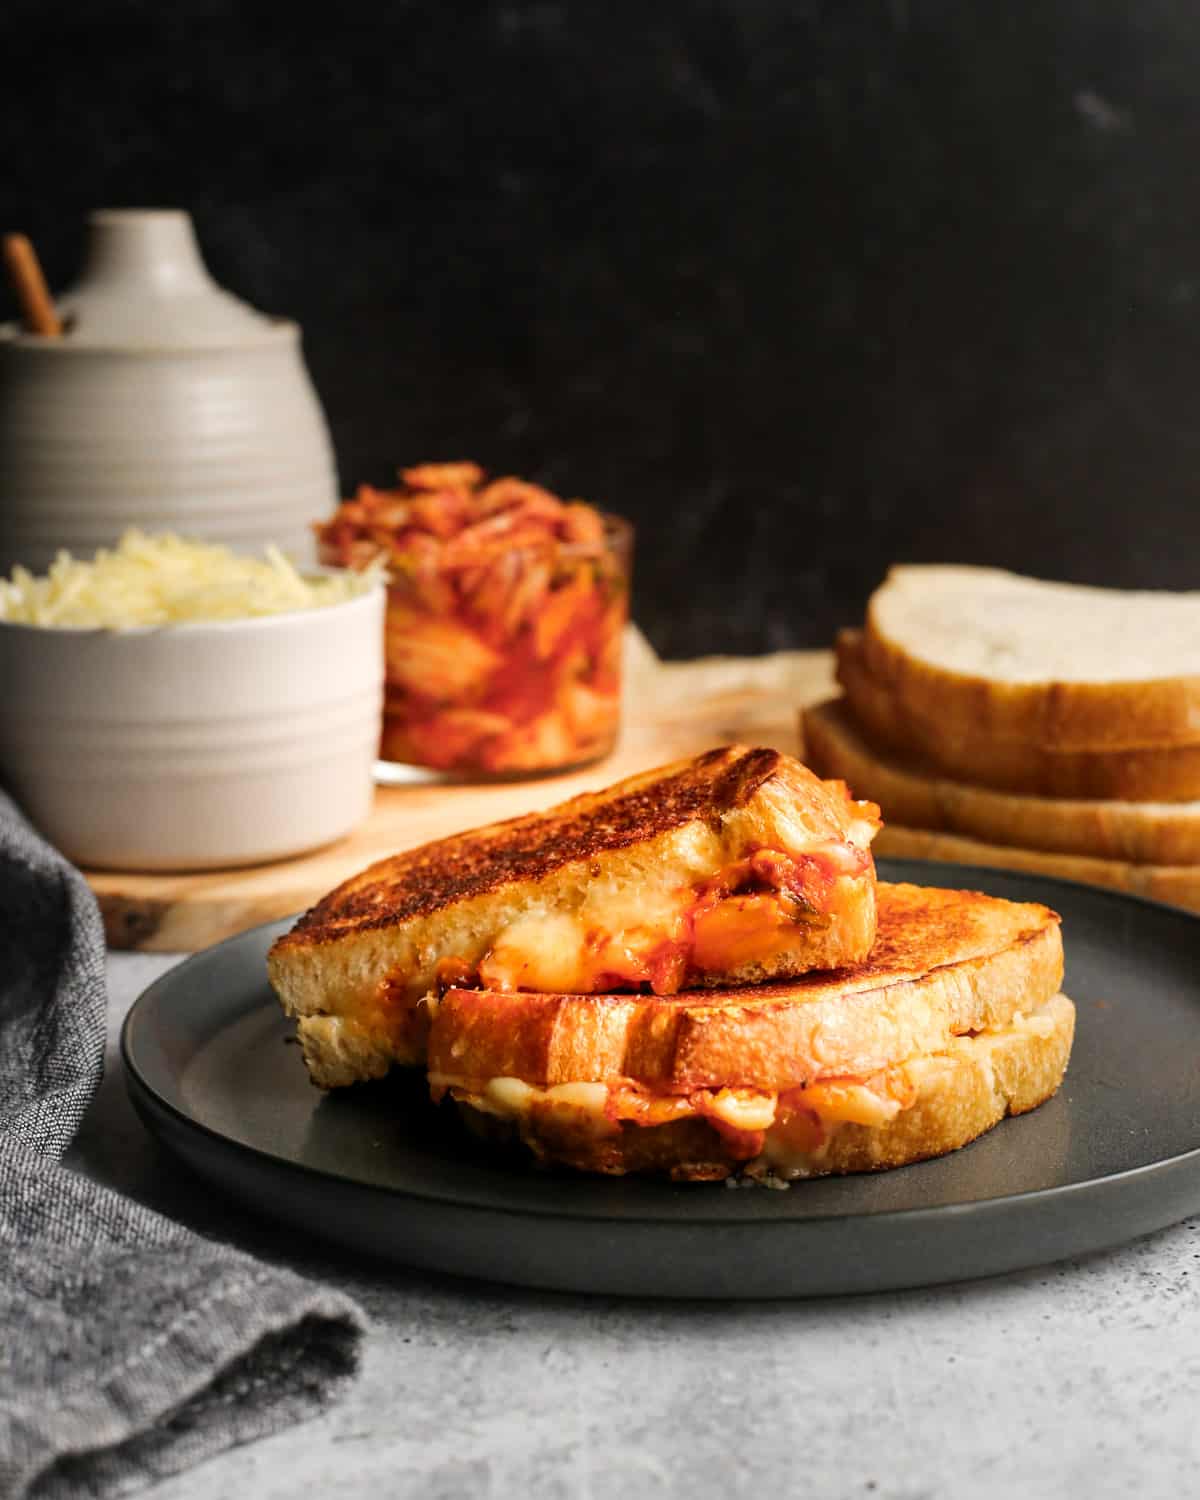
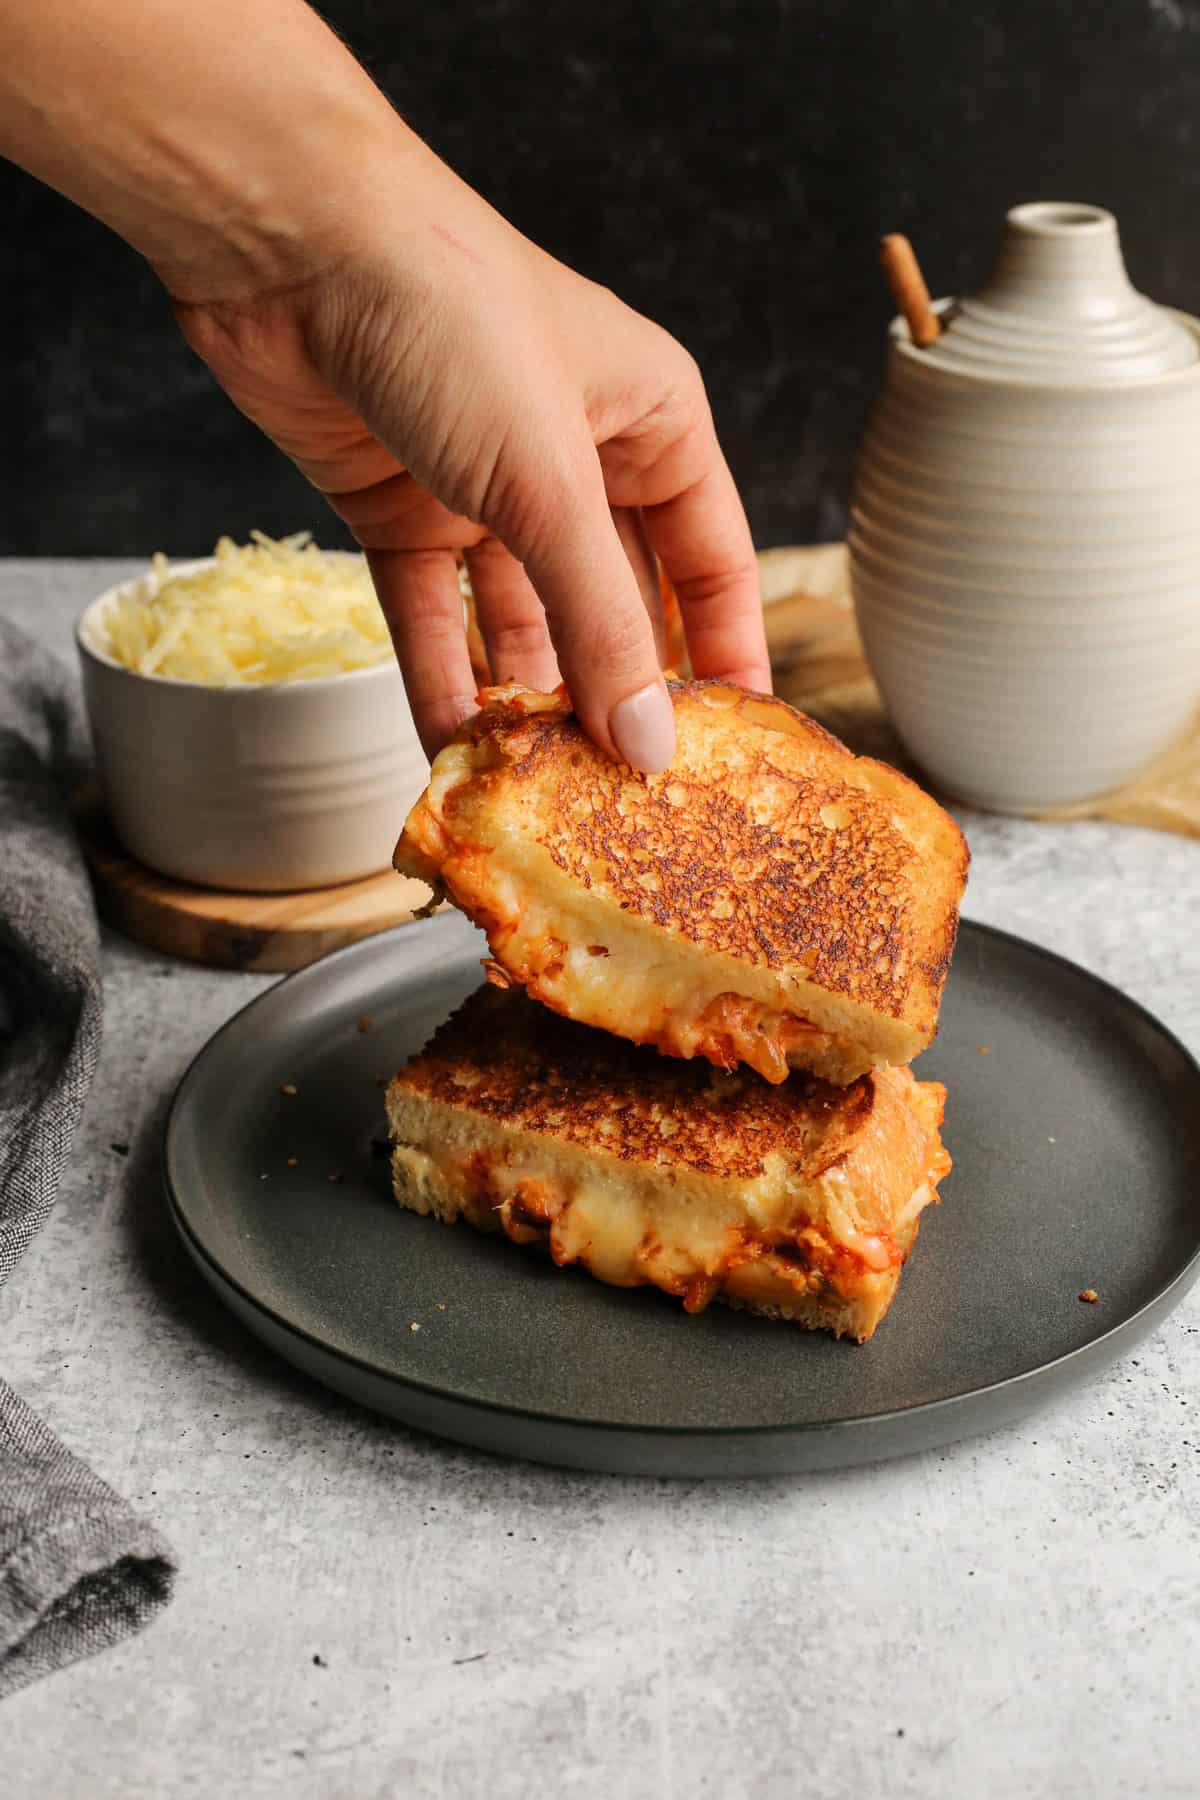
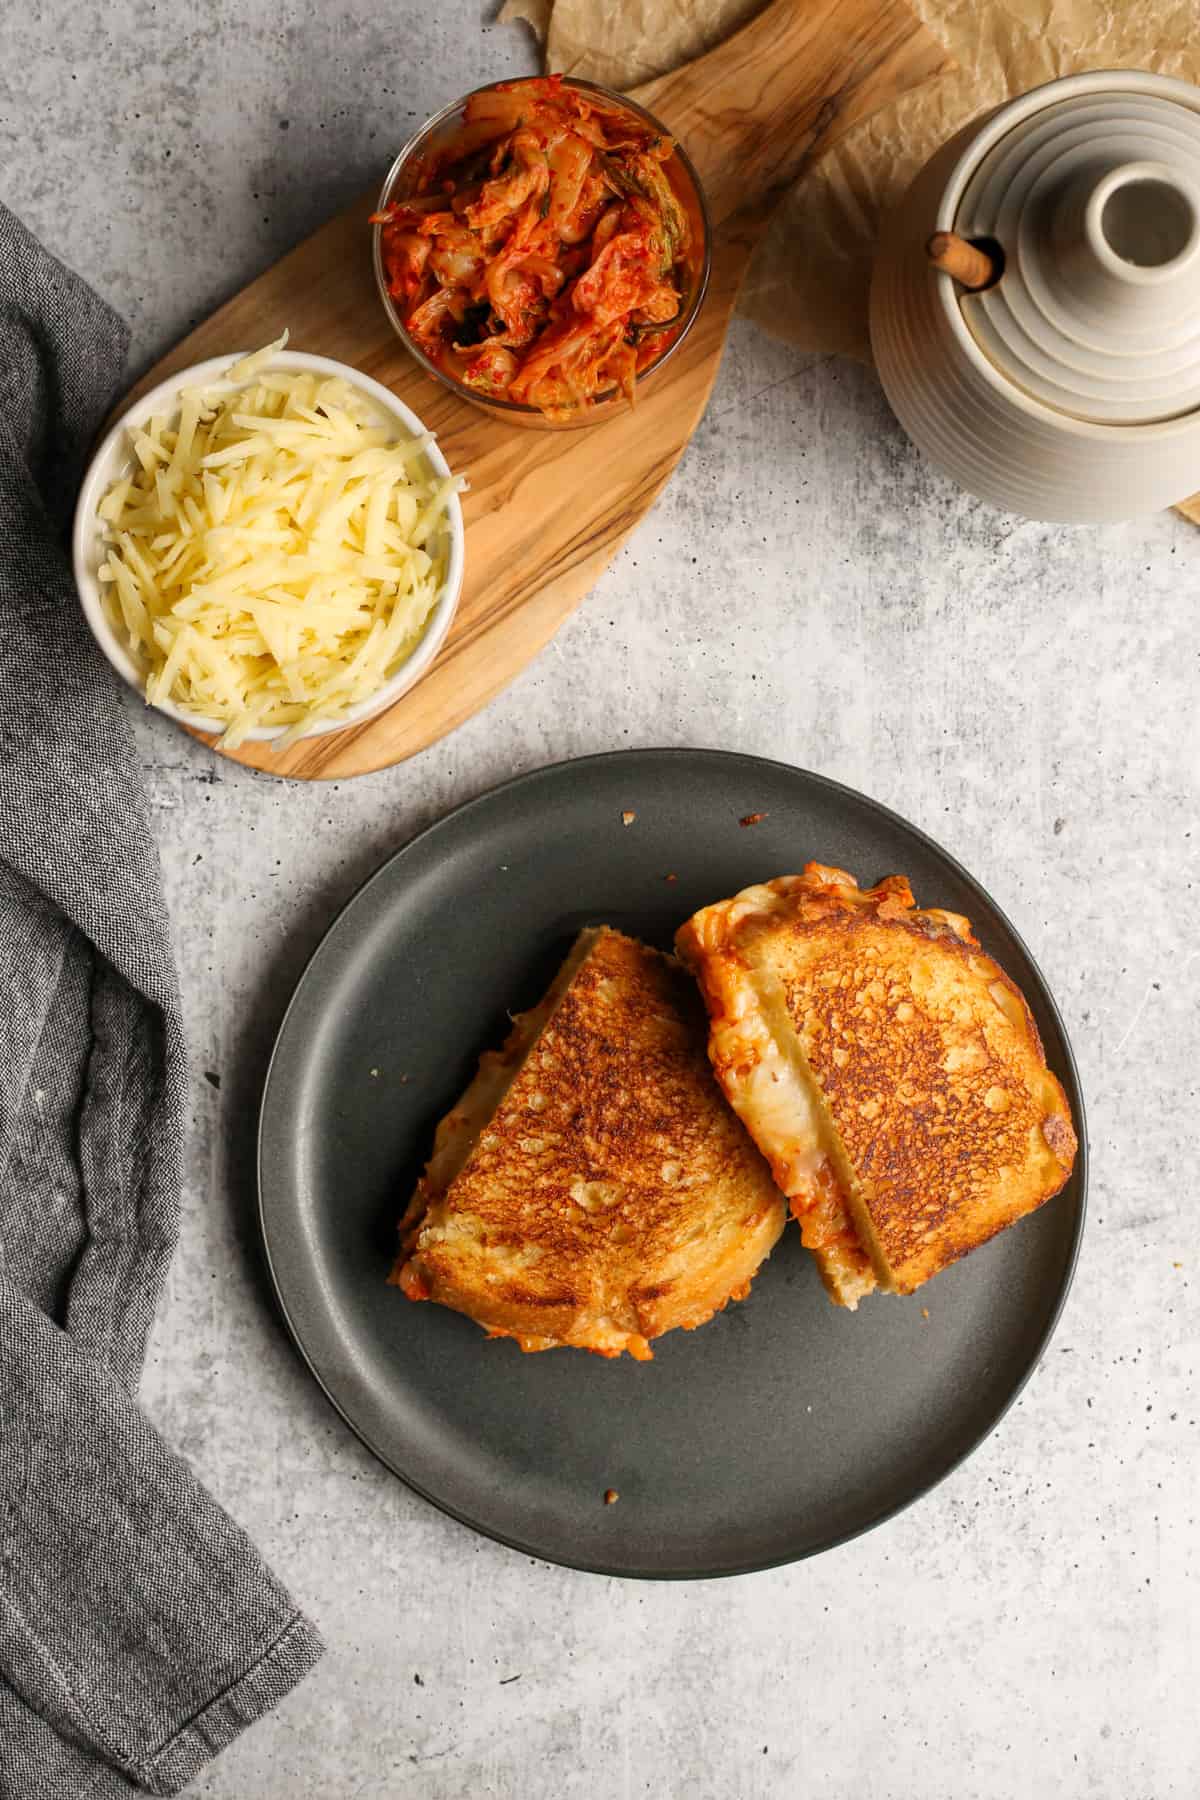
Kimchi Grilled Cheese is one of my favorite comfort foods! There are tons of variations of kimchi grilled cheese sandwiches, but I always make mine using this method. Enjoy this elevated version of an American classic combined with a quintessential flavor of Korea.
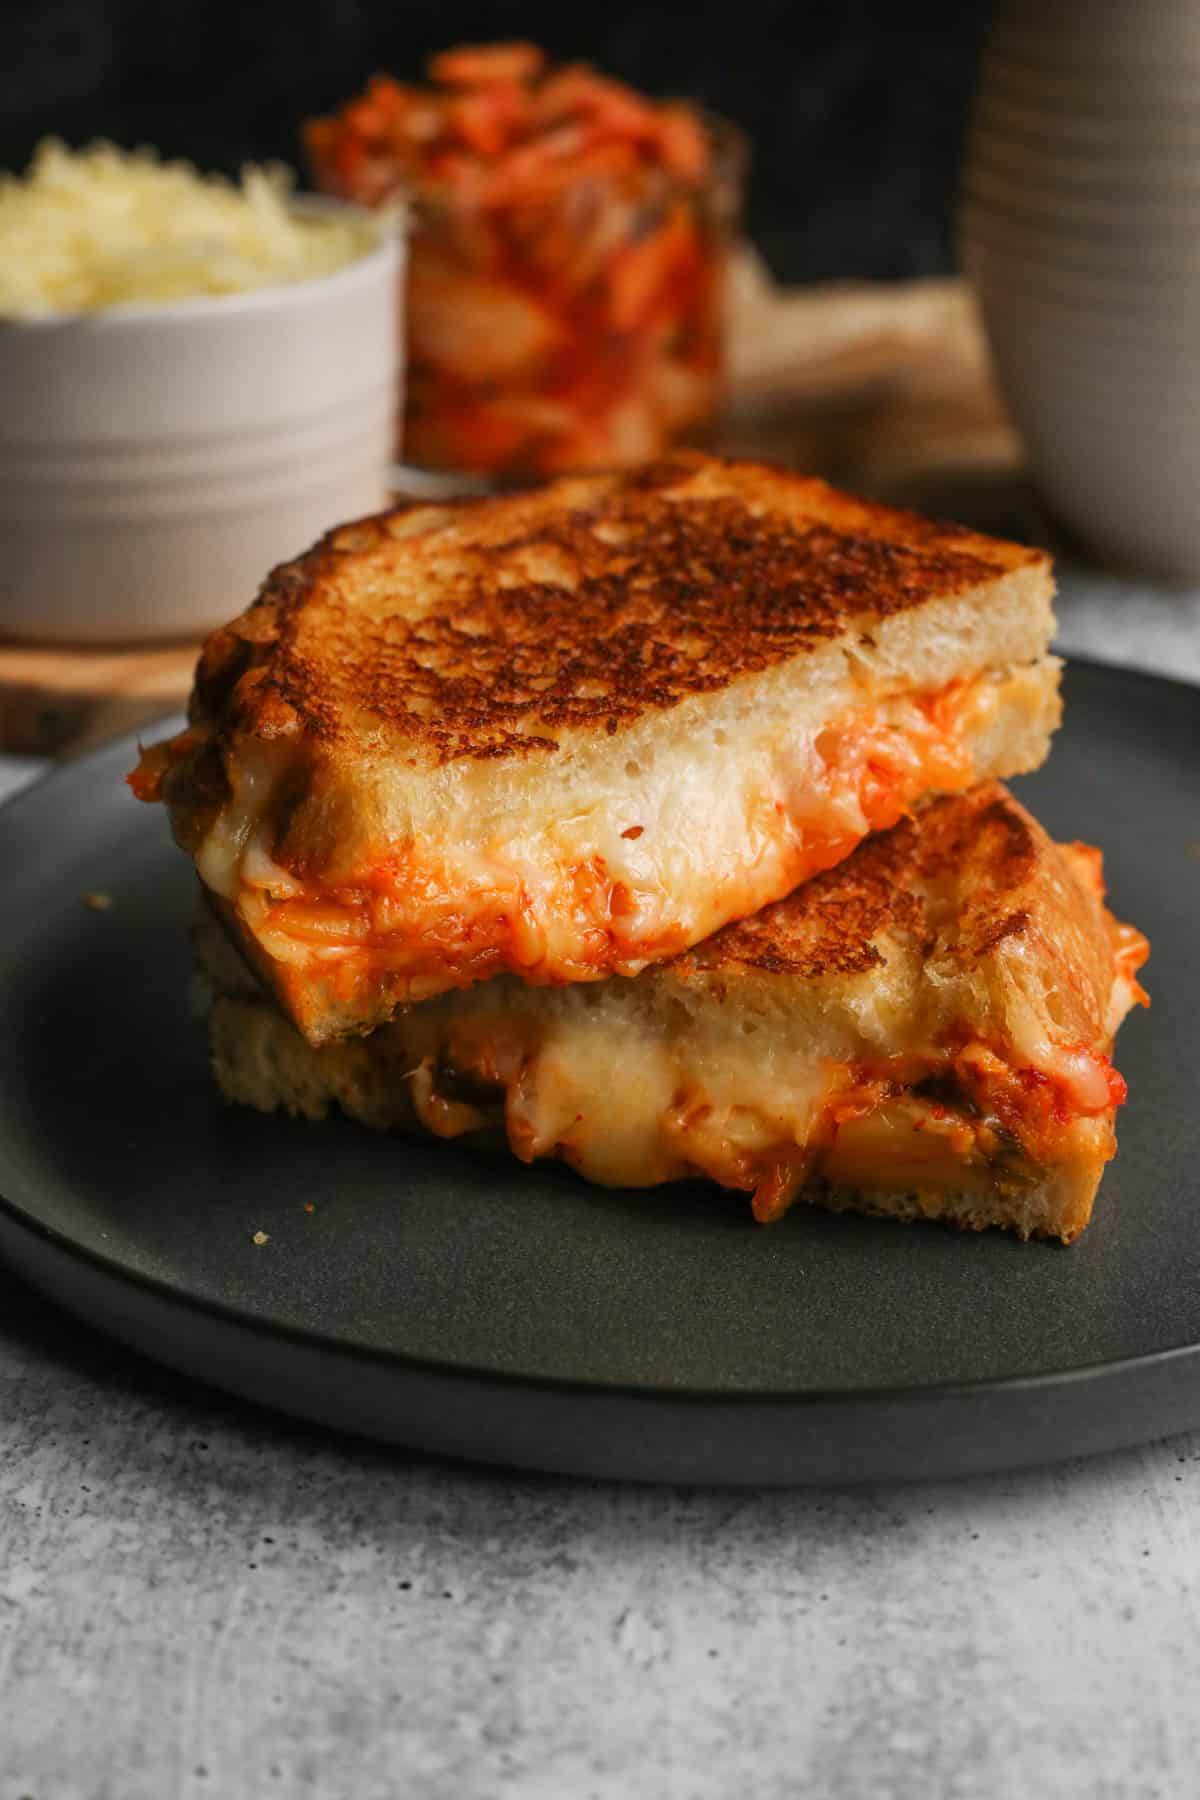
If you love a simple grilled cheese sandwich with crispy toast that’s stuffed with gooey melted cheese, you might think there’s no possible way to improve upon that. But you’d be wrong! Kimchi Grilled Cheese is an easy way to take a sandwich from good to great. I hesitate to call it perfect, but more on that later.
Regardless…it’s a pretty damn good sandwich. Let’s get into exactly why!
Why You’ll Love This Kimchi Grilled Cheese Sandwich
You might already be drooling. But just in case you’re not, here are a few reasons to love this kimchi grilled cheese recipe:
- It takes the classic grilled cheese sandwich to a whole ‘nother level by adding a layer of slightly spicy and tangy kimchi
- The mayo-method of making grilled cheese helps you get the perfect crispy toast without burning the bread
- Kimchi was just named a “top superfood of 2023” and its popularity shows no sign of slowing down.
While I honestly don’t love the idea of labeling anything a “superfood” it’s worth mentioning that kimchi and other fermented foods have been staples in global cuisines around the world for centuries. Korean kimchi is near & dear to my heart for very personal reasons, so I’m glad everyone is taking notice to celebrate it instead of shaming it!
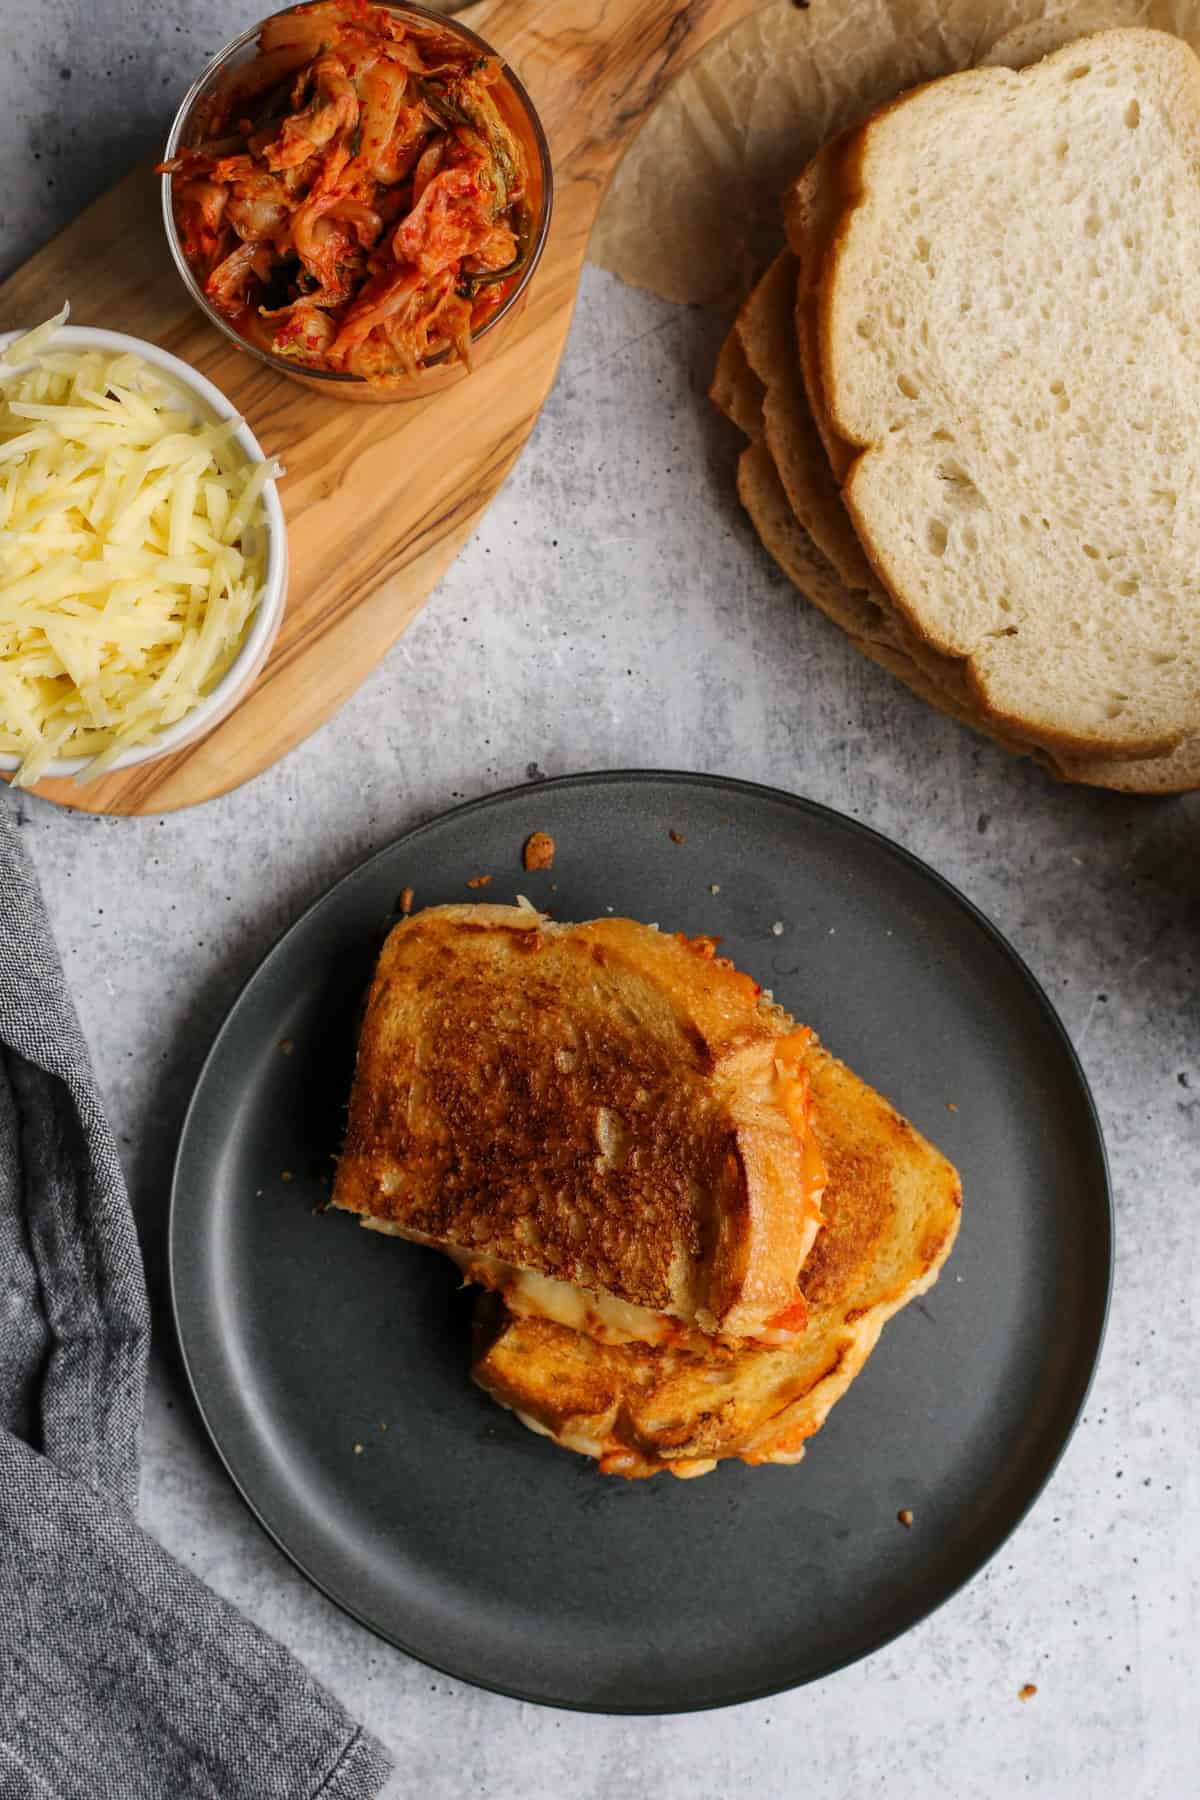
Ingredients You’ll Need
Here’s what you’ll need to make an “almost perfect” Kimchi Grilled Cheese sandwich:
- Sourdough bread. This is my top choice for its sturdy structure and unique flavor. It also contributes great flavor whether homemade or store bought.
- Melt-able cheese. Look for a softer style cheese like havarti, American, or mozzarella cheese. Slices are less messy than shreds, but I think shredded cheese melts faster and more evenly.
- Kewpie mayo. This Japanese-style mayonnaise is tangy with umami (savory) flavor. Use it instead of butter to achieve the perfect sear when toasting your kimchi grilled cheese.
- Kimchi. There are hundreds of styles of kimchi, but you’re most likely to find a version using napa cabbage (baechu kimchi or simply kimchi) in your local grocery store. Blessings upon you if you’re lucky enough to have the option of using homemade kimchi!
- Toasted sesame oil or honey. I lightly brush the inside-facing side of the bread slices with toasted sesame oil or honey to add even more flavor, but both of these are totally optional. Use one or the other or skip altogether if you’re aiming for simplicity.
If you can’t find or don’t have kewpie mayo, no worries! Just use regular, full-fat mayonnaise. Skip the light or “lite” stuff which has a higher water content and can make your sandwich very soggy.
Kimchi flavor will change as it ages. When it’s freshly made (as in, the first few weeks) it will have a sharper, more tangy or sour flavor. As it gets older (AKA more fermented) the flavor will have more of a funk to it and the crispier pieces will soften. Keep this in mind as you build your kimchi grilled cheese, and select the pieces and type of kimchi that you like best.
Wondering how to use what’s left in the jar? I recommend adding kimchi to my Korean Beef & Rice Bowls, mix it into Weeknight Chicken Fried Rice, or use it along with other favorite toppings for burgers. And of course you can always serve it the Korean way, as banchan or a shareable side dish to accompany any meal!
Can I use something other than cabbage kimchi?
Yes! I’ve also made this with green onion kimchi (pa-kimchi) and white kimchi (baek kimchi). This is a less spicy kimchi because it doesn’t use Korean red pepper flakes (gochugaru). If you’re sensitive to spice or just want a milder flavor, this can be a good option.
If you’re moving away from kimchi entirely, this will no longer be a kimchi grilled cheese sandwich. But hey, that’s still an option. Try it with sauerkraut, which is another fermented vegetable, or sun-dried tomatoes for umami flavor and color.
Look for kimchi in the “health food” section of your grocery store, or at any Asian or Korean market. Keep it refrigerated, and after opening it should last at least a couple of months.
How To Make Kimchi Grilled Cheese
This recipe is written for one sandwich, but just repeat the basic steps for however many sandwiches you need or want!
- Start by heating your nonstick skillet or griddle. Aim for medium heat so it’s hot enough to toast the bread and melt the cheese, but not so hot it scorches or burns the bread before the inside is heated. If that’s too much, adjust to medium-low heat instead.
- Drain the kimchi to get rid of extra moisture and give it a rough chop. Shred your cheese if you’re not using slices or a pre-shredded option.
- Brush the inside of one slice of sourdough bread with toasted sesame oil or honey (if using). Then build your sandwich by adding a layer of cheese, a layer of kimchi, then another layer of cheese. Brush the second piece of bread (optional) and place it on top.
- Carefully spread the kewpie mayo in an even layer on the top piece of bread. Once your pan is heated, carefully and quickly flip the sandwich upside down into the pan so the mayonnaise side cooks first. As it grills, brush the remaining outside layer of bread with mayo.
- Quickly flip with a spatula after 3-4 minutes or when the cheese begins to melt and the bread is toasted to your liking. Cook another 2-3 minutes so the other piece of bread is golden brown and the cheese is fully melted. Serve hot and enjoy!
Kimchi will stain a lot of things, including clothing, countertops, and cutting boards! To minimize mess, you can use kitchen shears to chop the kimchi into smaller pieces over a bowl instead of chopping on a cutting board. Or, follow my lead and designate a special cutting board for anytime you’re cooking with kimchi.
While this flipping method isn’t the cleanest (especially the first time you try it), I find it to be the most convenient to avoid smearing mayo all over the place. I admit, it does make a mess sometimes, which is why I call it “almost perfect” kimchi grilled cheese. But if you don’t mind that, just smear the mayo first and build your sandwich before placing it in the heated skillet with a spatula.
Why Use Mayo for Kimchi Grilled Cheese?
I’m certainly not the first to recommend using mayo for grilled cheese sandwiches. Food experts and chefs have been saying this for years!
Mayonnaise is an oil-based fat, which has a higher smoke point than butter. This will let you cook it longer before it scorches or burns, while still keeping the inside of the bread fluffy or chewy. The egg component of mayo is also helpful for getting the beautiful brown color. That’s always my signal that the bread is deliciously toasted and crispy.
This resource from The Kitchn experimented with different cooking fats and oils. According to their testing methods, the best results were actually from mayo + butter. But honestly, that extra step and extra ingredient doesn’t always seem worth it to me when I can get an “almost perfect” sandwich using just mayo. I really don’t agree with their rating for mayo only, which is another reason why I recommend kewpie mayo instead of regular mayo if possible. Kewpie mayo includes MSG (monosodium glutamate) which adds rich, savory, umami flavor that might have been missing in The Kitchn’s taste test.
As always, adjust this recipe based on what you like best. There’s no judgment so make it your own!

Kimchi Grilled Cheese
Equipment
- nonstick skillet or griddle
- Spatula
Ingredients
- 2 slices sourdough bread
- 3/4 tbsp kewpie mayonnaise
- 3 oz cheese, such as havarti, American, or mozzarella in shreds or slices
- 1/4 to 1/2 cup sliced cabbage kimchi, drained and roughly chopped
- 1/2 tsp toasted sesame oil, optional
- 1 tsp honey, optional
Instructions
- Heat the nonstick skillet or griddle over medium heat.
- Drain the sliced cabbage kimchi to remove excess moisture. Roughly chop into smaller pieces.
- Meanwhile, build the sandwich by lightly brushing one side of the bread slices with toasted sesame oil or honey (if using). Layer half of the cheese onto one slice, followed by the drained and chopped kimchi and the remaining cheese. Top with the second slice of bread.
- Evenly spread half of the mayonnaise onto the top slice of bread. Quickly and carefully flip it upside down into the heated skillet to grill. Spread the remaining mayo in an even layer on the second slide of bread.
- Once the bottom slice is toasted and the cheese begins to melt (about 3 minutes), use a spatula to flip the sandwich and grill the other side for about 2-3 minutes until the cheese is fully melted and the sandwich is toasted to your liking.
- Remove from heat and allow to cool slightly before serving. Slice in half and enjoy while hot.
Notes
Nutrition
If you try this kimchi grilled cheese, leave a comment and rating to let me know what you think.
As always, thanks for stopping by Street Smart Nutrition. Cheers to more fearlessly nourishing meals!
Disclaimer: This post was originally published in March 2023. It has since been updated to improve the overall quality of the information and/or images.


Questions & Reviews
Using Kewpie mayo on the toasted side of the bread was genius, as it didn’t feel greasy. Spreading the sesame oil added a whole new level to the flavor composition, along with the kimchi and the different shredded cheeses I added. All in all, an easy recipe to follow and very delicious! Perfect if you want something quick to eat without the hassle!