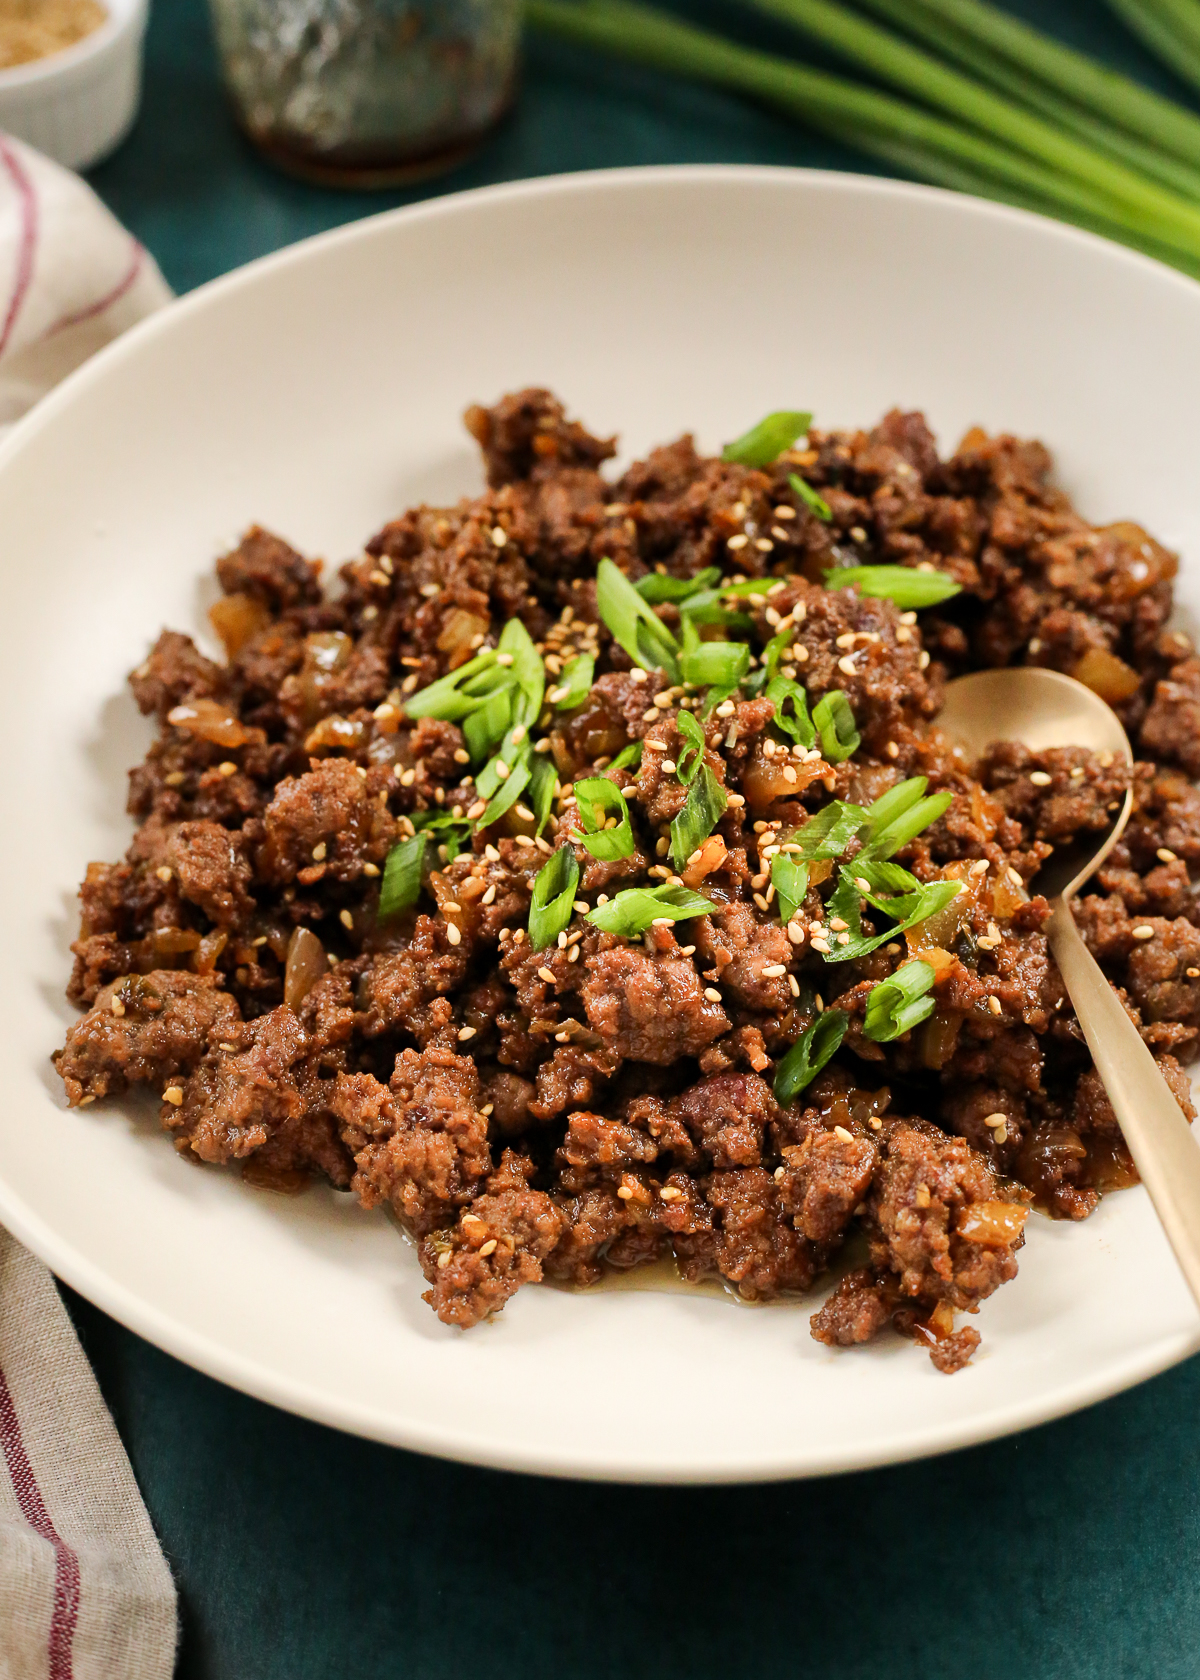
Meet your new favorite Korean beef bowl! This Ground Beef Bulgogi recipe will satisfy your KBBQ craving from the comfort of home. Ready in less than 30 minutes and meal prep friendly for delicious leftovers!

What’s Included In This Post
What is Bulgogi?
Bulgogi is one of the most widely recognized Korean dishes. Besides perhaps kimchi! If you’re a fan of Korean food, you already know why it’s so popular, but if you haven’t tasted it yet, you’re in for a treat!
“Bulgogi” translates to “fire meat”, referencing the way strips of marinated beef were seared over very high heat on a grill or barbecue. Ribeye or sirloin steak are popular picks for their flavor, marbling, and tenderness. The thin slices are seared quickly so they don’t get tough or chewy, but the high heat gives them a slight char with caramelized flavor. That sweetness contrasts with the savory, salty flavors in the marinade.
When it’s served hot with fluffy white rice, lettuce wraps (ssam) or your favorite side dishes like japchae, it’s so delicious!
But it’s probably not practical or affordable to dine out for KBBQ every night…so save this recipe for a quick, weeknight rice bowl recipe inspired by the flavors of traditional beef bulgogi!
Street Smart Nutrition Tip: The “B” sound in “bulgogi” is actually more like a “puh” instead of a hard “bull”. My best tip for pronunciation is to relax your lower face and gently puff the air through your lips when saying “bulgogi” instead of curving your lips inward. This softens the sound and more closely matches the way it’s said in Korean, which emphasizes this syllable (not the “go” syllable which many Americans tend to stress instead).
Ground Beef Bulgogi Bowl Ingredients
Thankfully, bulgogi doesn’t need a ton of specialty ingredients. You can probably find everything you need in a regular grocery store. But Asian grocery stores or Korean markets will have even more options for you.
If you don’t have one near you, you can also buy online. Check out my Amazon storefront (affiliate link) for my favorite Korean Cooking Essentials!
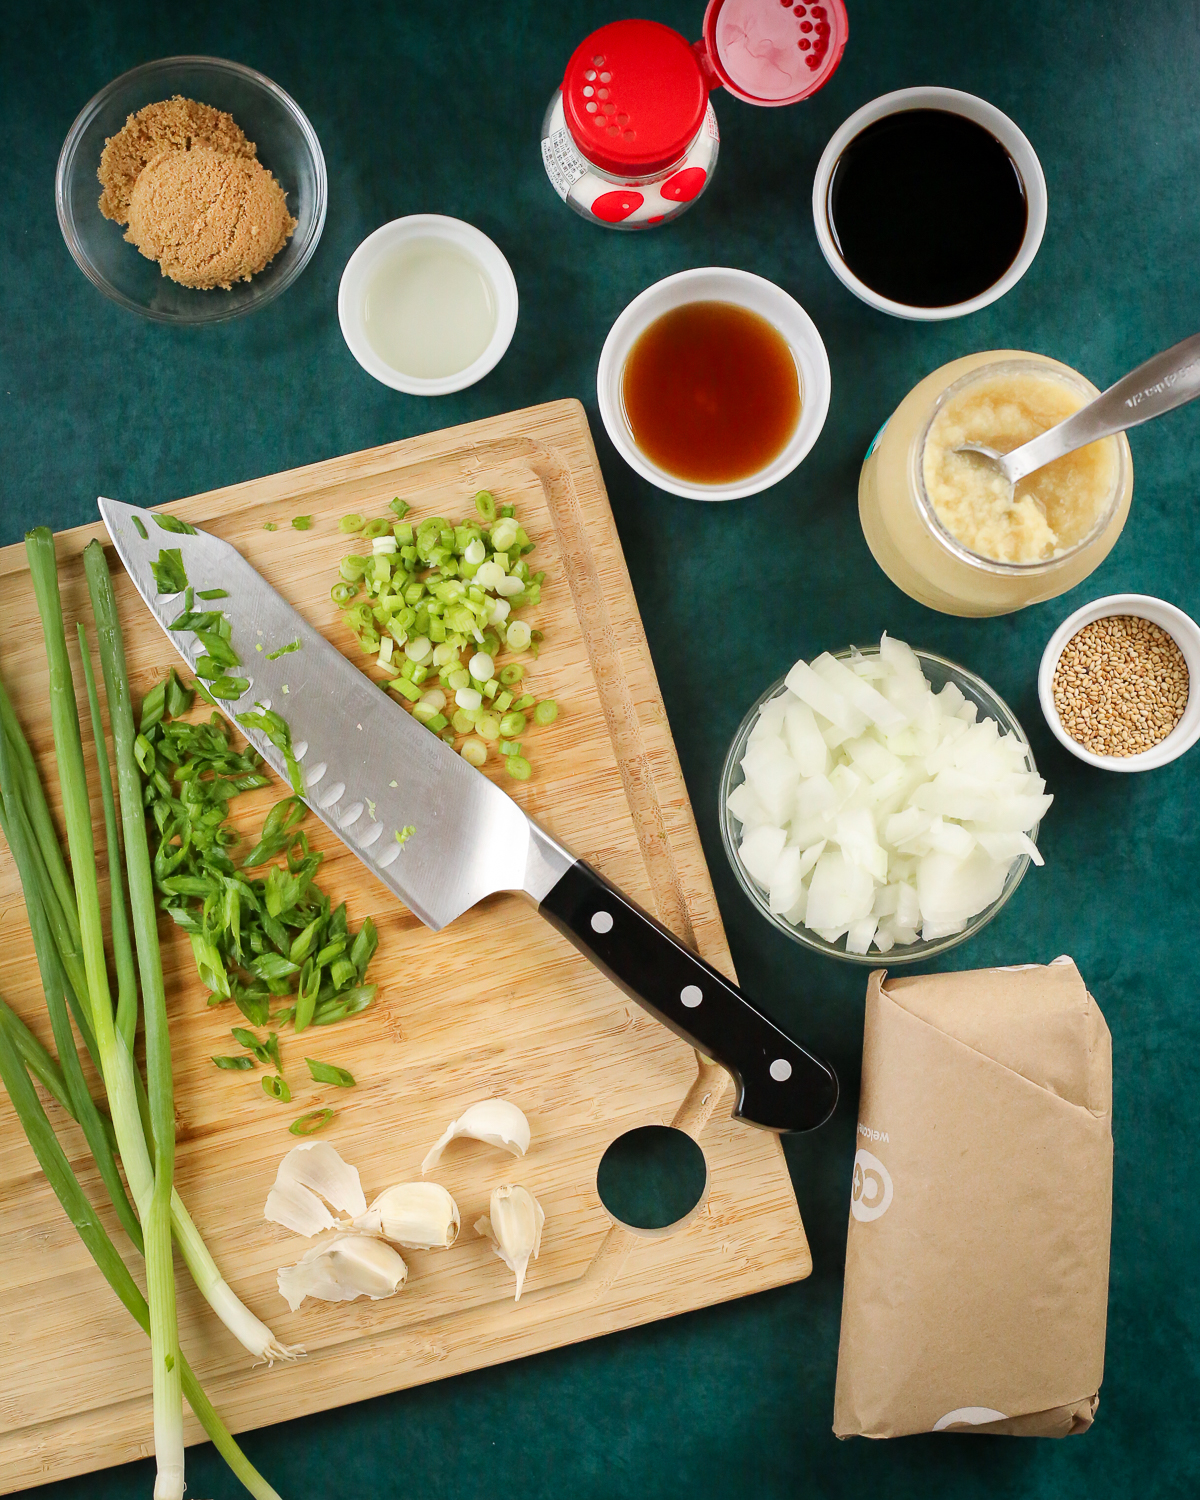
- Lean ground beef. I tried this with an 80/20 mix and it was a bit too greasy once mixed with the bulgogi sauce. Try an 85/15 or 90/10 mix for best results.
- Yellow onion
- Garlic
- Green onions. Use the entire stalks, but keep the white stems separated from the green ends when you slice them up.
- Low-sodium soy sauce
- Brown sugar
- Toasted sesame oil
- Rice vinegar.
- Minced ginger or ginger paste. This is optional if you don’t have it, but my family’s bulgogi recipe always included fresh ginger so I love when I can pick up on that flavor in the finished dish!
- MSG (monosodium glutamate) and your choice of pepper. Use black pepper, white pepper, or Korean red pepper flakes (gochugaru), and if you have it, the MSG rounds out the savory, salty flavors to balance the sweetness.
- Toasted sesame seeds. Again, optional, but they add some subtle flavor and texture, plus they are a nice garnish on top.
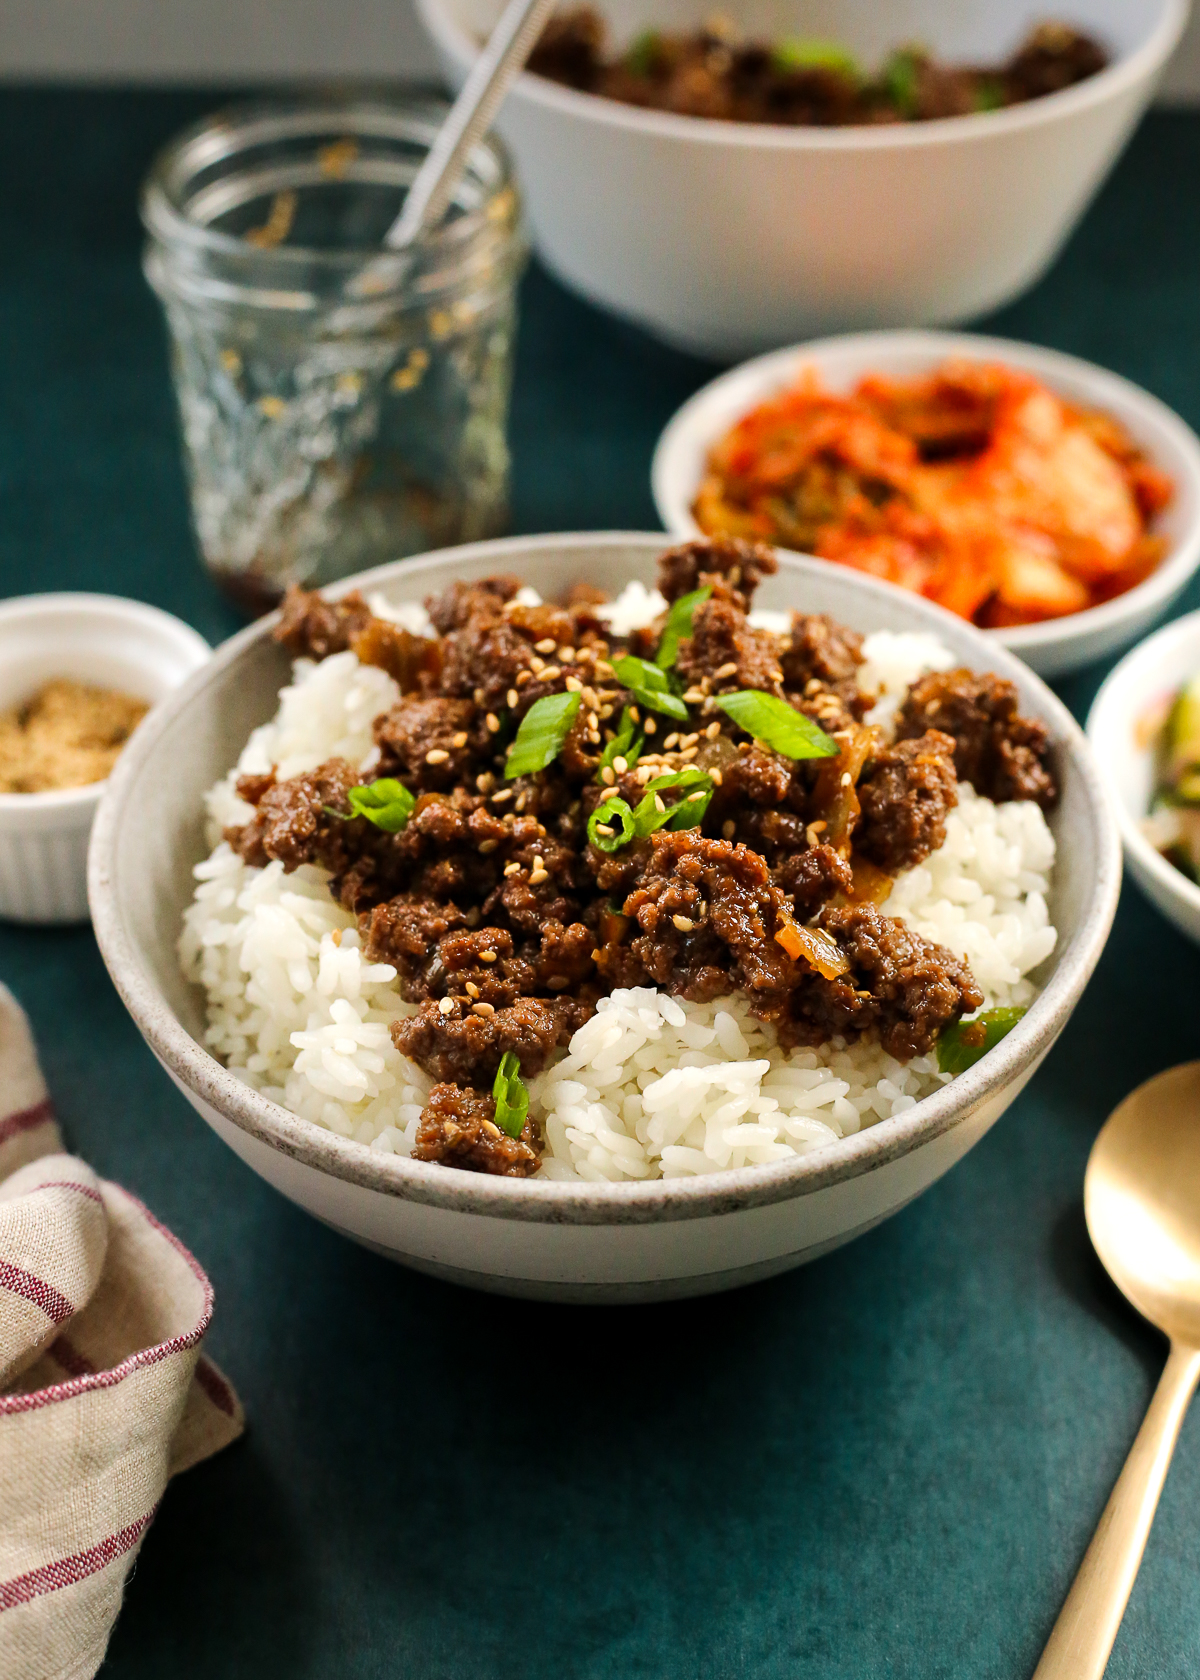
And of course, you’ll also want some freshly steamed white rice to serve it with. Plan to add any of your favorite side dishes (banchan) as well.
Street Smart Nutrition Tip: Many bulgogi marinade mixtures include Asian pear for added sweetness. They have an enzyme that acts as a meat tenderizer, something that also adds to the tender, juicy texture of the cooked beef. However, they can be expensive or hard to find outside of Asian markets or Korean grocery stores. I left it out to hopefully make this ground beef bulgogi recipe more approachable for the average home cook, but keep it in mind for next time if you try a different version!
Swaps and Substitutions
There’s a saying that there are as many kimchi recipes as there are mothers in Korea. And well, I haven’t heard that about bulgogi but I imagine it’s similar!
There are many different ways to make bulgogi. The goal isn’t to be 100% “authentic” or make the most traditional Korean bulgogi possible. For me, the goal is just to get dinner on the table!

Here are a few ideas to modify the base recipe to make it work for you and your family:
- Soy sauce is not a gluten-free ingredient, so if needed, switch to tamari or coconut aminos. The flavor will be slightly different than the classic bulgogi sauce. It may be more or less salty than you expect. Keep the volume the same and taste test it before adding any additional salt or MSG.
- Swap out the ground beef for ground pork. It’s my second favorite protein to use for this dish!
- Add some extra veggies. Try red bell peppers, matchstick carrots, sliced mushrooms, or extra onions.
- If you prefer a more sweet flavor for the sauce, swap the rice vinegar for mirin, which is sweetened and less acidic than rice vinegar or rice wine vinegar.
One swap I don’t recommend: replacing the white rice. To me, that’s the ideal base for soaking up the extra sauce. The fluffy texture makes the grains mix easily with the small pieces of ground beef. I think it’s perfect as is, 10/10, no improvements needed.
But if you don’t share that opinion, do what you gotta do! I promise, there’s no judgment from me if you build your bulgogi bowls differently with something like brown rice or cauliflower rice.
Street Smart Nutrition Tip: If you plan to make this or any other Korean recipe often, stock up on all the key ingredients! Get my list of the Top 10 Korean Pantry Essentials HERE.
How to Make Ground Beef Bulgogi Bowls
There’s minimal prep work for this recipe, and it cooks quickly. You can be done in less than 30 minutes from start to finish!
- Start with fresh or thawed ground beef. Measure the sauce ingredients and whisk them together in a small jar or measuring cup until the brown sugar is dissolved.
- Dice the yellow onion and slice the green onions. Separate the white ends from the green stalks, as you’ll reserve those for a garnish later.
- Heat a large skillet over medium to medium high heat. Add a small amount of cooking oil of your choice, then sauté the onions.
- After 3-4 minutes, the onions should appear translucent. Add the garlic and whites of the green onions and cook for another 30 seconds. Stir frequently to avoid scorching.
- Add the ground beef and brown for 8-9 minutes, or until no pink remains and the beef is fully cooked.
- Pour in the sauce and reduce the heat slightly. The sauce should come to a low simmer and thicken as the sugar starts to caramelize. Stir to ensure all of the ground beef mixture is well-coated and seasoned.
- After just a couple minutes, the sauce should be thickened and you’re done!
Street Smart Nutrition Tip: If you’re cooking a fresh batch of plain rice, start that first as it may take the full 30 minutes to finish. Otherwise, reheat pre-cooked rice towards the end of cooking so everything is hot and ready at the same time.

Serving Suggestions for Ground Beef Bulgogi Bowls
As seen here, you can simply drop a spoonful on top of a bowl of white rice and enjoy an easy dinner!
But don’t stop there, as you have many choices for delicious side dishes and toppings. The contrast of colors, textures, and flavors takes this meal from good to great.

I almost always include extra green onions and toasted sesame seeds. You can also add a sprinkle of pepper or another drizzle of sesame oil. You can even draw inspiration from bibimbap bowls and add a fried egg in the center.
And here are a few popular side dishes that I recommend pairing with these Ground Beef Bulgogi Bowls:
- Oi Muchim (Spicy Korean Cucumber Salad)
- Mixed Greens Salad with Yuzu Vinaigrette
- Your favorite type (or types!) of kimchi
- Quick Pickled Cucumbers and Onions
- Massaged Kale Salad with Sesame-Lime Dressing
- Sauteed Green Beans with Soy Sauce Glaze

Meal Prep and Storage Tips
These Ground Beef Bulgogi Bowls work well for leftovers and meal prep. Here are a few tips for best results:
For Leftovers: Transfer everything to an airtight container and seal. No need to separate the beef from the rice. Store in the refrigerator for 4-5 days, then just microwave until reheated when you’re ready to serve again.
For Meal Prep: If needed, double the batch to yield additional servings. I also recommend increasing the amount of sauce you make, as it tends to seem less saucy as it sits. Try adding about 50% more of each sauce ingredient. You can store the rice separately, or build out your planned portions in individual containers. Just follow the same steps for reheating leftovers and you’re all set for a quick meal later!
Ground Beef Bulgogi Bowls
Ingredients
- 1 lb lean ground beef
- 1/2 yellow onion, diced, about 1 cup
- 4 cloves garlic, minced, about 1 1/2 tbsp
- 2-4 medium green onions, sliced, whites and greens separated
- steamed white rice, for serving
Bulgogi-Inspired Sauce
- 1/4 cup low sodium soy sauce
- 3 tbsp brown sugar
- 1 1/2 tbsp toasted sesame oil
- 1 tbsp rice vinegar
- 1 tsp minced ginger or ginger paste
- 1 tsp toasted sesame seeds
- 1/4 tsp MSG (monosidum glutamate), optional
- 1/8 to 1/4 tsp pepper of your choice (black pepper, white pepper, or gochugaru), optional
Instructions
- Cook the white rice according to package directions using your preferred method (stovetop, rice cooker, etc).
- Start with fresh or thawed ground beef. Measure the sauce ingredients and whisk them together in a small jar or measuring cup until the brown sugar is dissolved.
- Dice the yellow onion and slice the green onions. Separate the white ends from the green stalks, as you'll reserve those for a garnish later.
- Heat a large skillet over medium to medium high heat. Add a small amount of cooking oil of your choice (if needed), then sauté the onions. After 3-4 minutes, the onions should appear translucent. Add the garlic and whites of the green onions and cook for another 30 seconds. Stir frequently to avoid scorching.
- Add the ground beef and brown for 8-9 minutes, or until no pink remains and the beef is fully cooked.
- Pour in the sauce and reduce the heat slightly. The sauce should come to a low simmer and thicken as the sugar starts to caramelize. Stir to ensure all of the ground beef mixture is well-coated and seasoned.
- After 2-3 minutes, remove from heat, transfer to a serving bowl, and enjoy on top of cooked white rice along with other side dishes or toppings of your choice.
Nutrition
When I first tested this recipe, my partner took one bite and told me, “You can go ahead and make this all the time if you want.” Safe to say, it was an instant hit! We enjoy it often on busy weeknights.
I hope you enjoy it as much as we do. Give it a rating or leave a comment to let me know what you think. And since you have some of the staple ingredients now, I hope you try a few other Korean-inspired recipes next!
As always, thanks for stopping by the Street Smart Nutrition blog. Cheers to more fearlessly nourishing meals!


These bowls are so flavorful! The savory, slightly sweet sauce pairs perfectly with the beef and veggies, and it’s such a quick, satisfying meal. Perfect for a weeknight!